Revival Vintage Eyewear · Internal
FAQ
Common questions, answered.
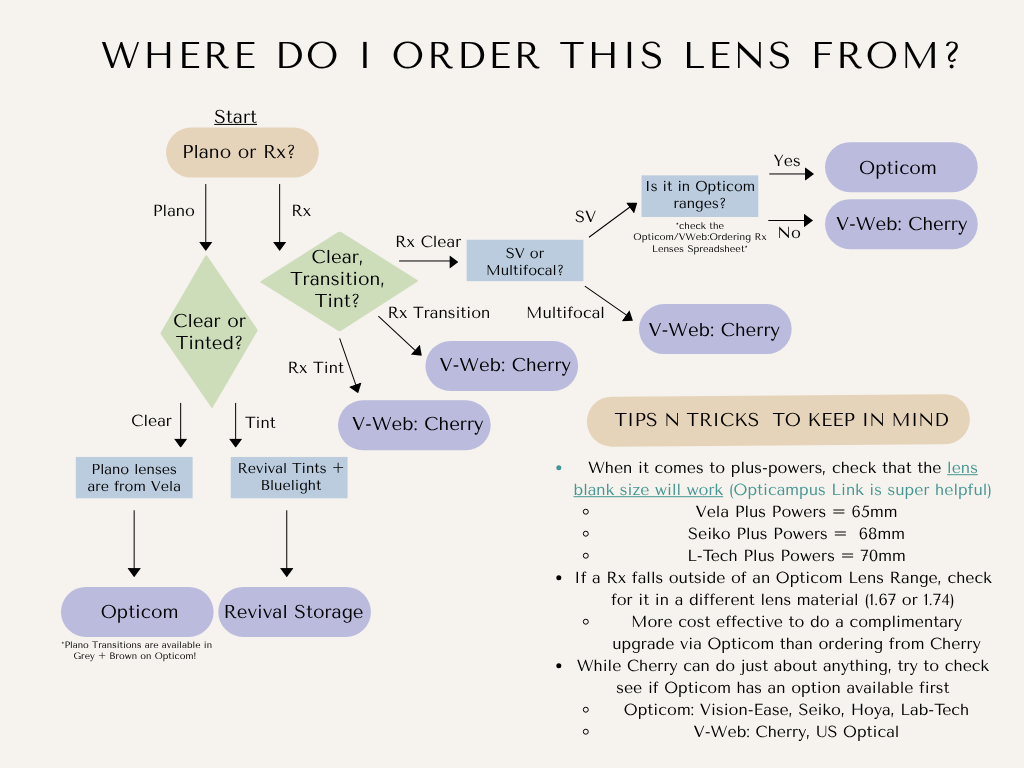
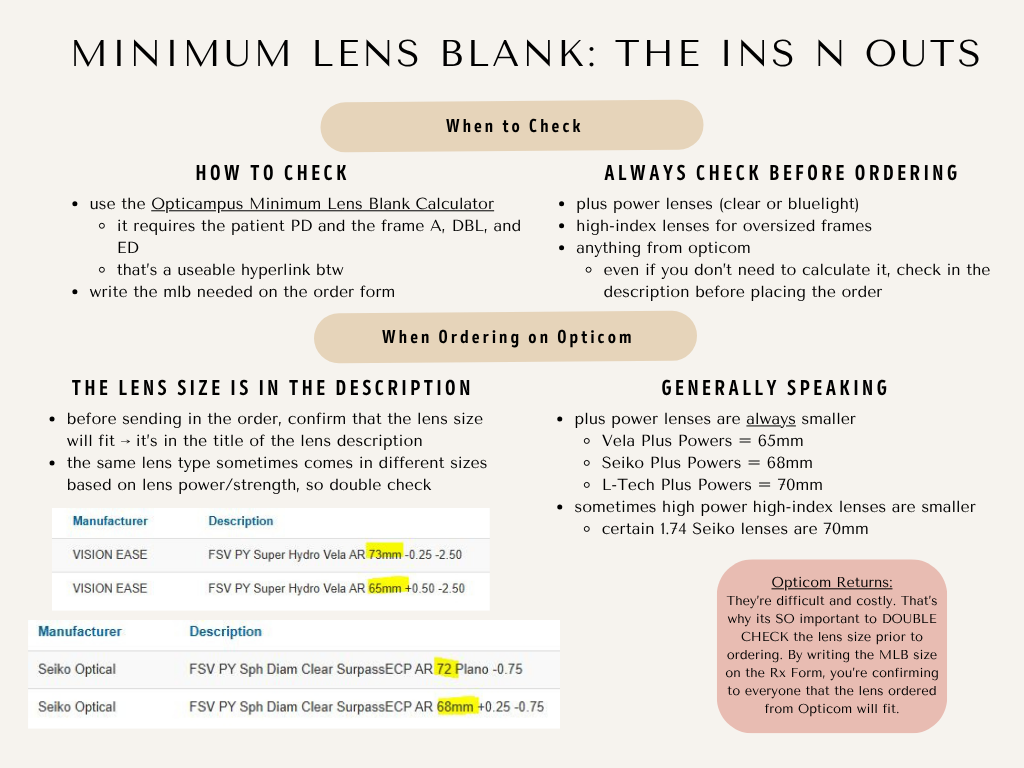
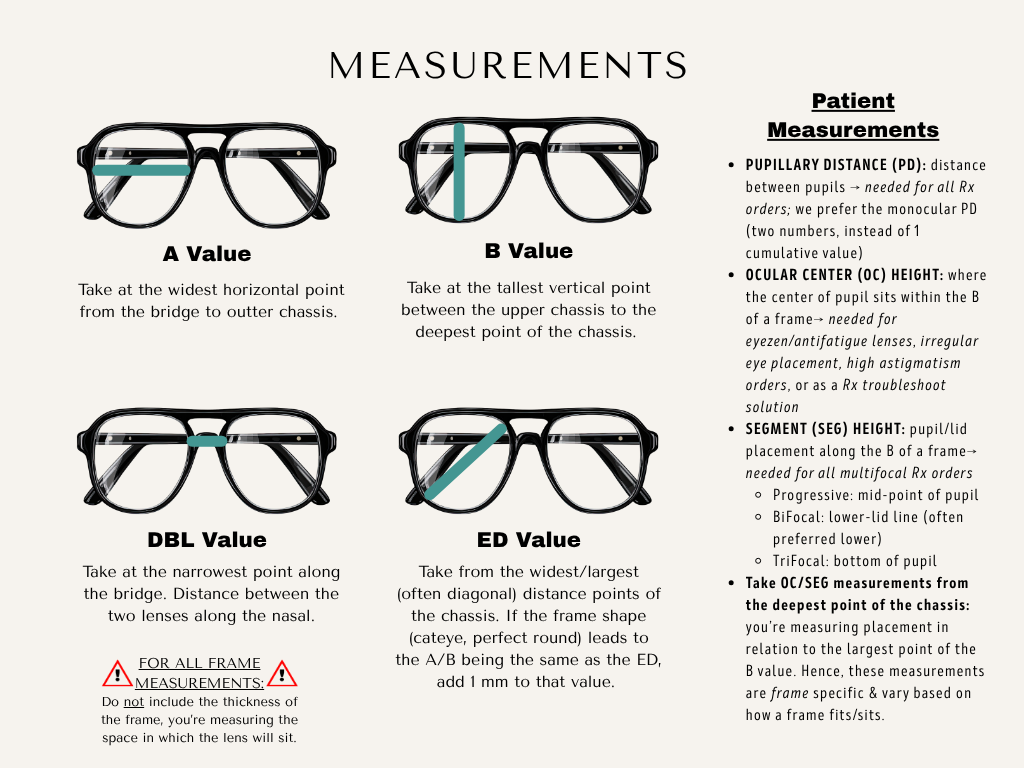
How do I order a lens?
▾
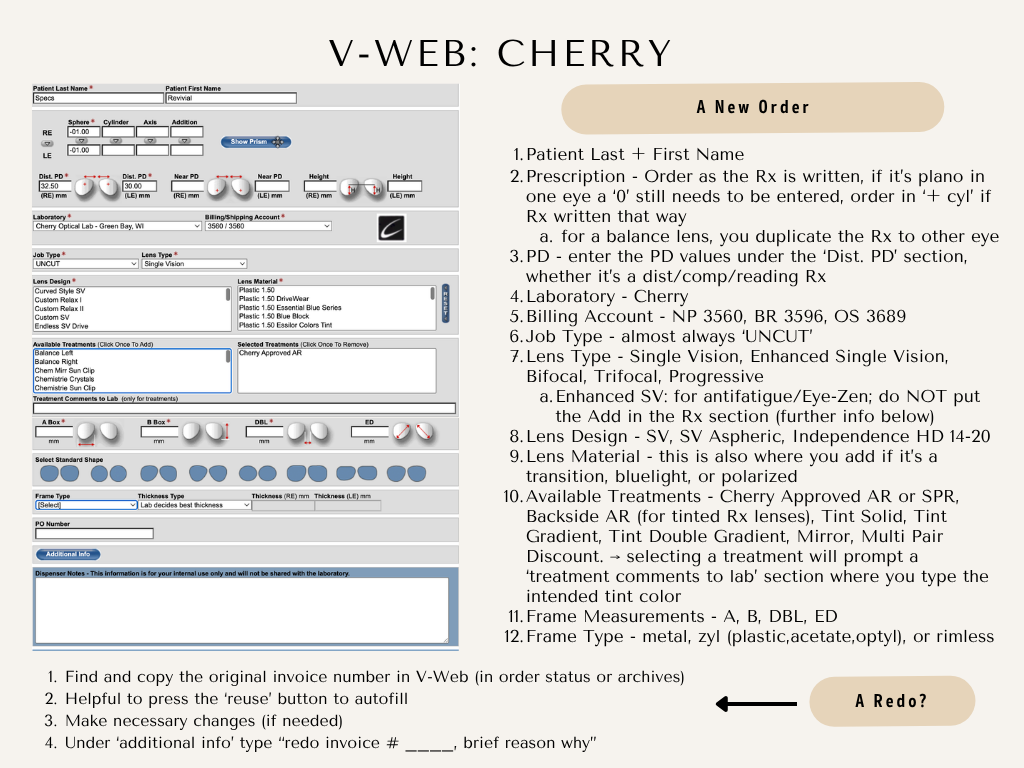
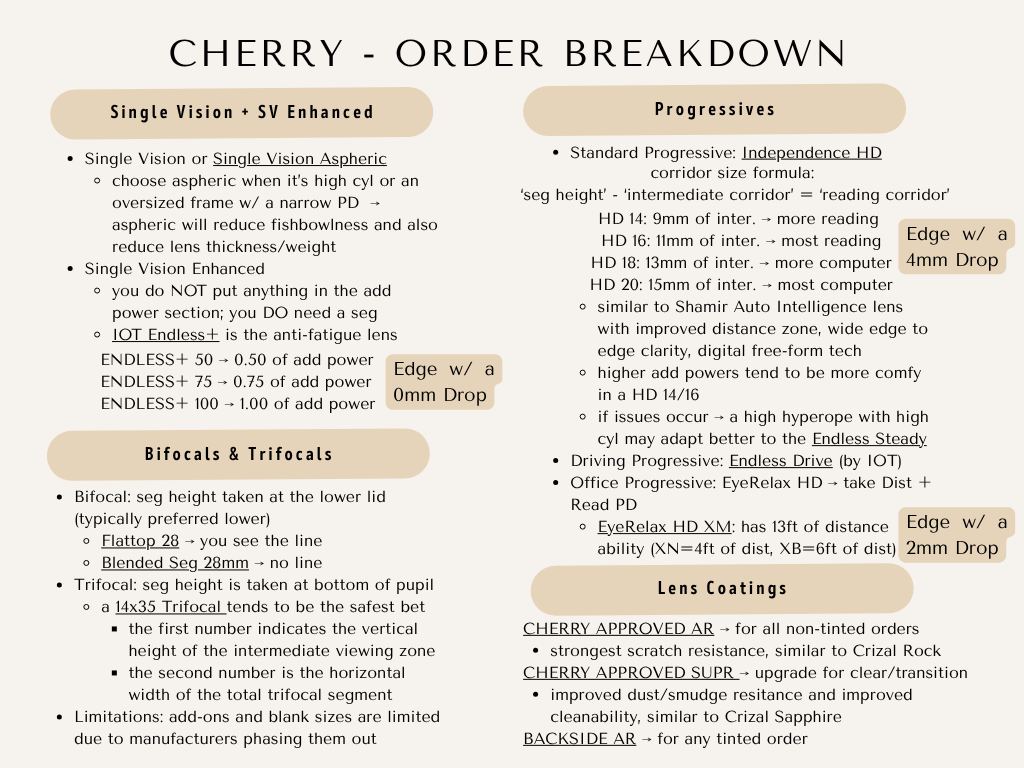
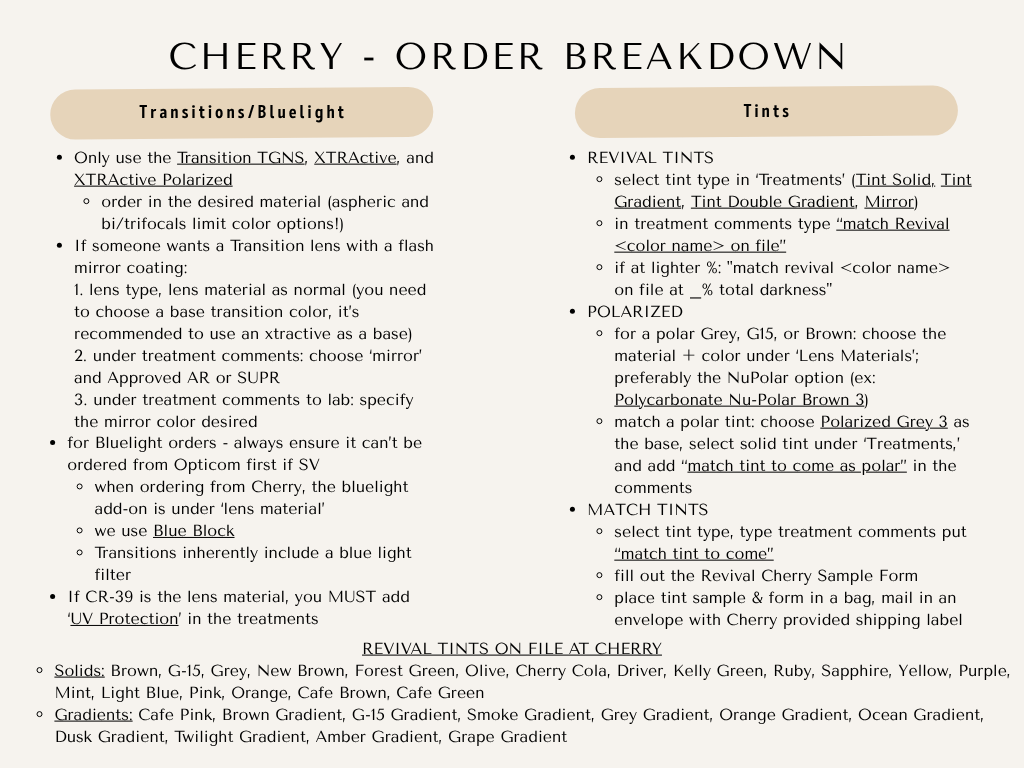
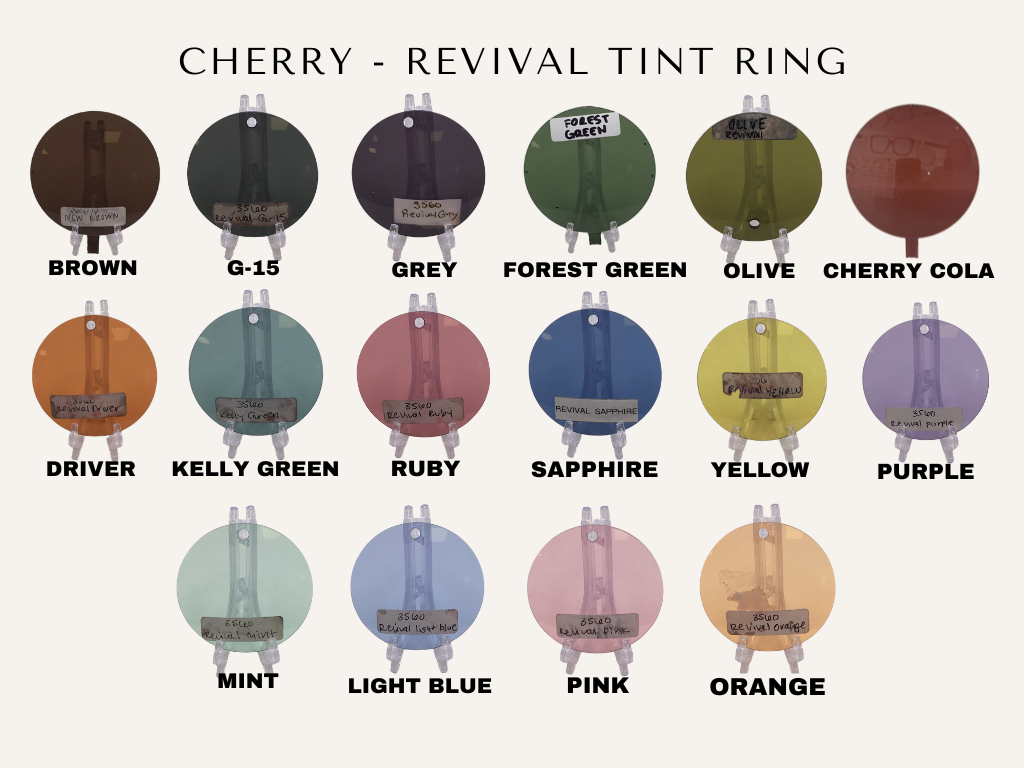
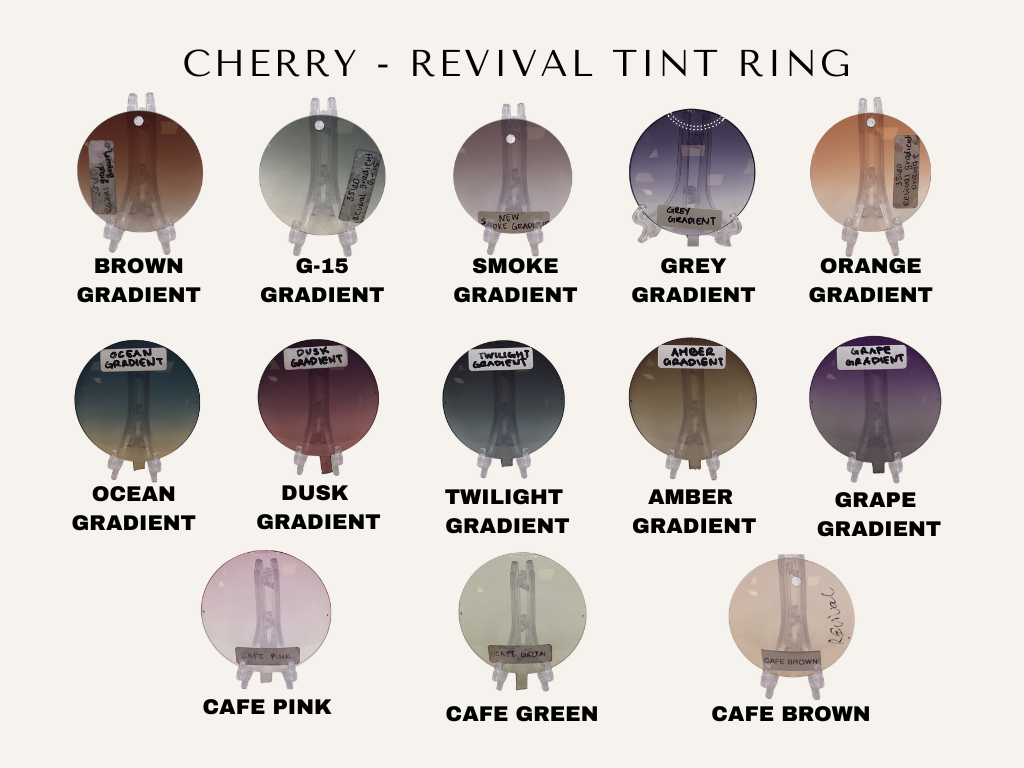
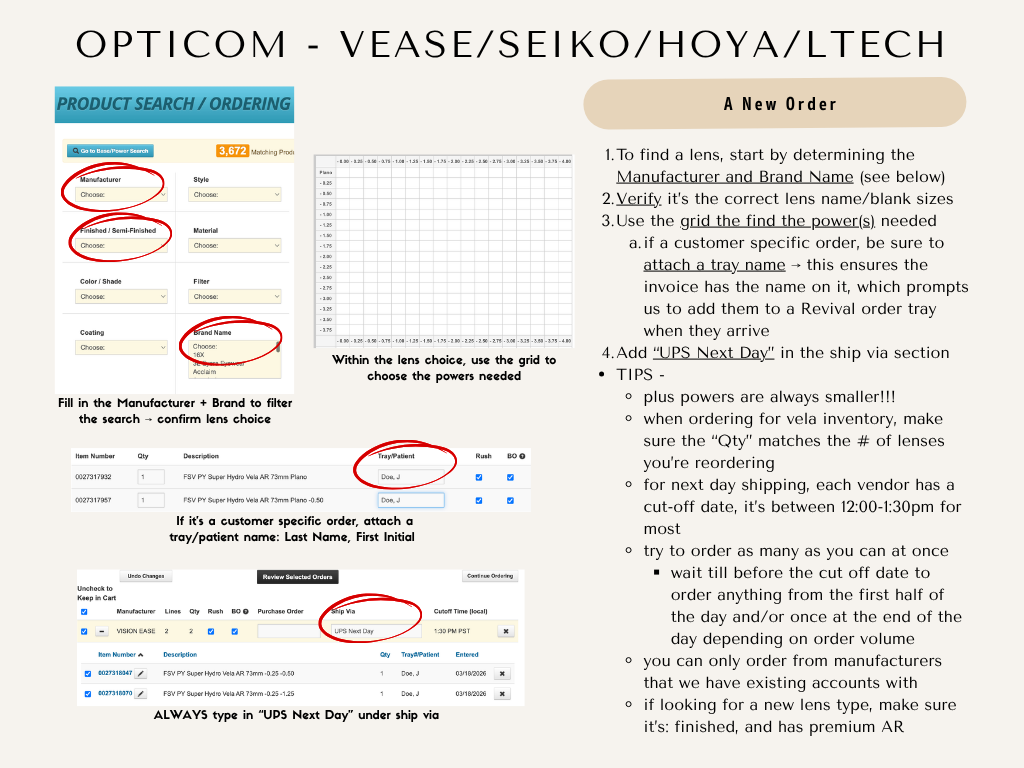
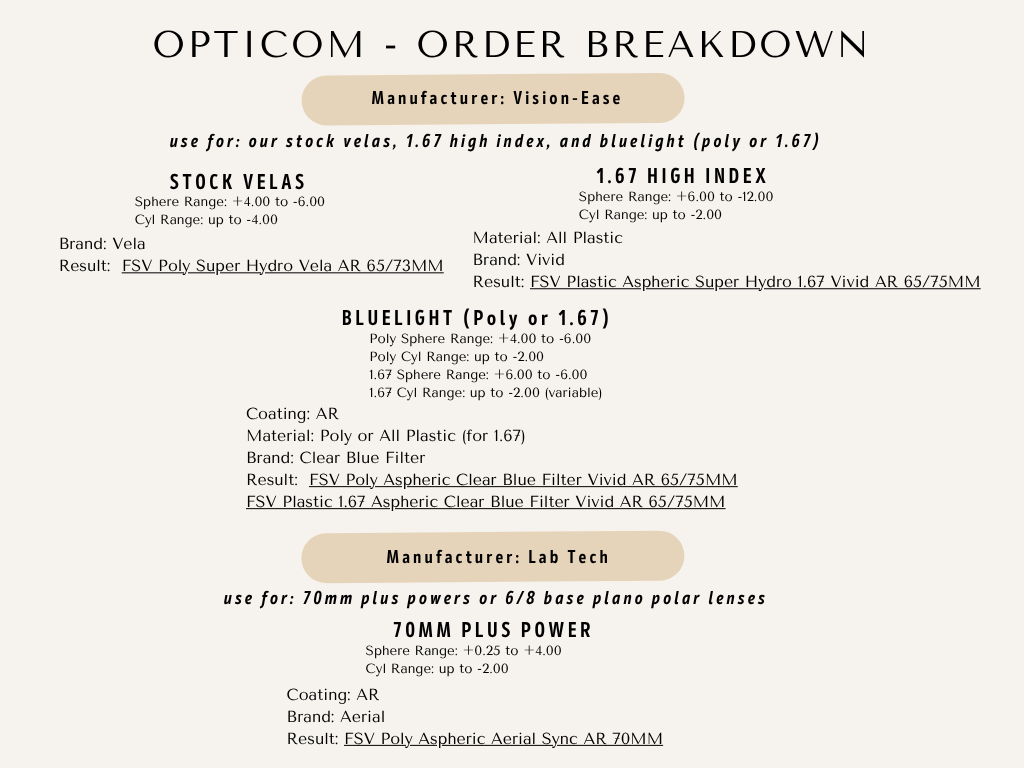
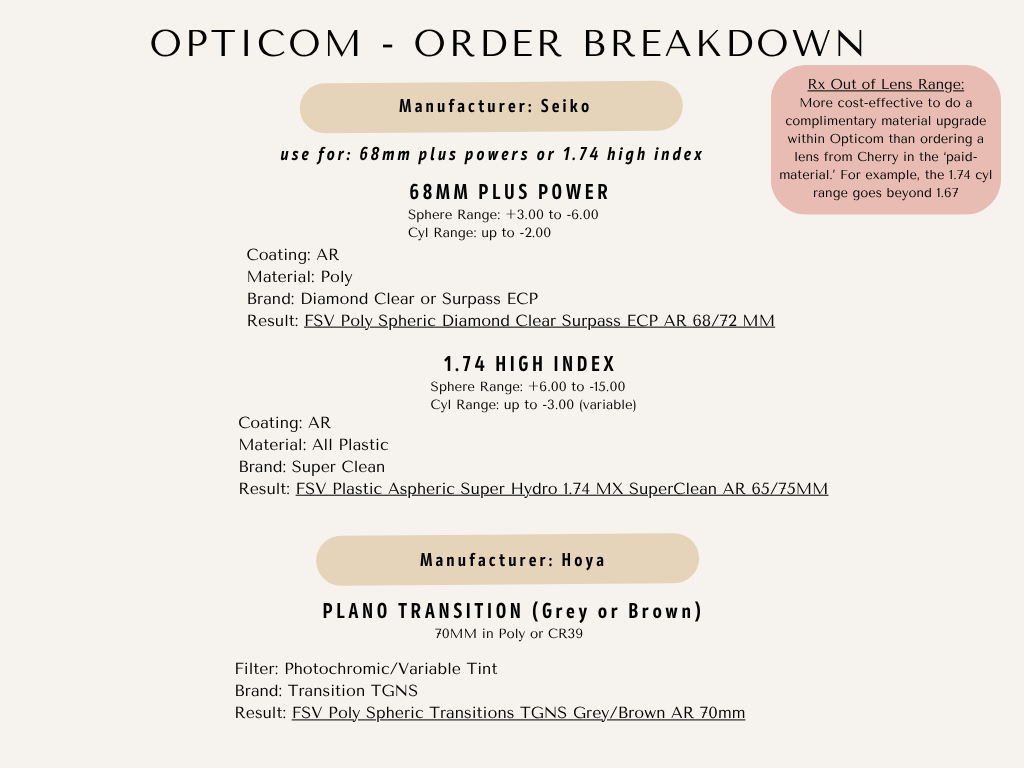
How do I work the Coburn?
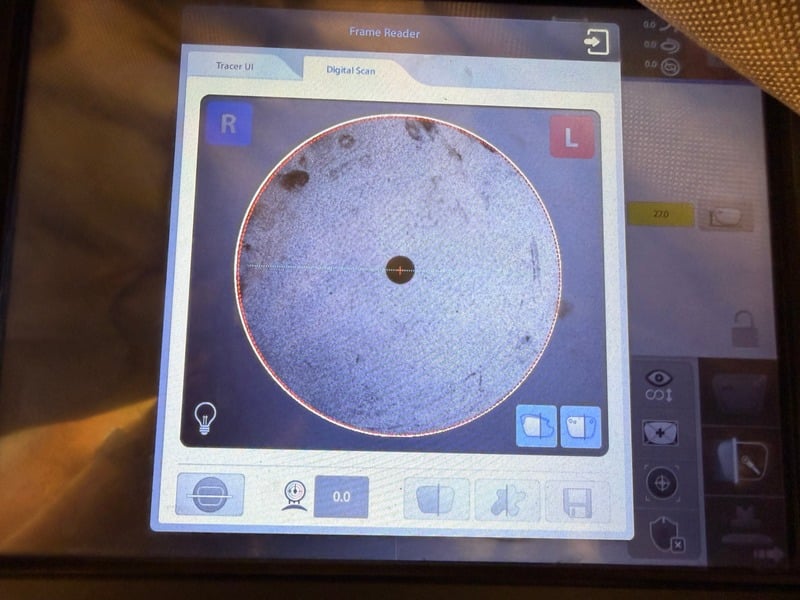
▾Digital Scan
- Use lensometer to create a 180 guideline on the demo lens, go over it with a Black AR Pen
- Measure the basecurve of the demo lens
- Remove lens for digital scan
- Choose R/L lens
- Enter demo lens BC
- Match the dots with the 180 line on screen — make sure it's a darker line
- Save scan
- Confirm the lens bevel type, add necessary safety bevels
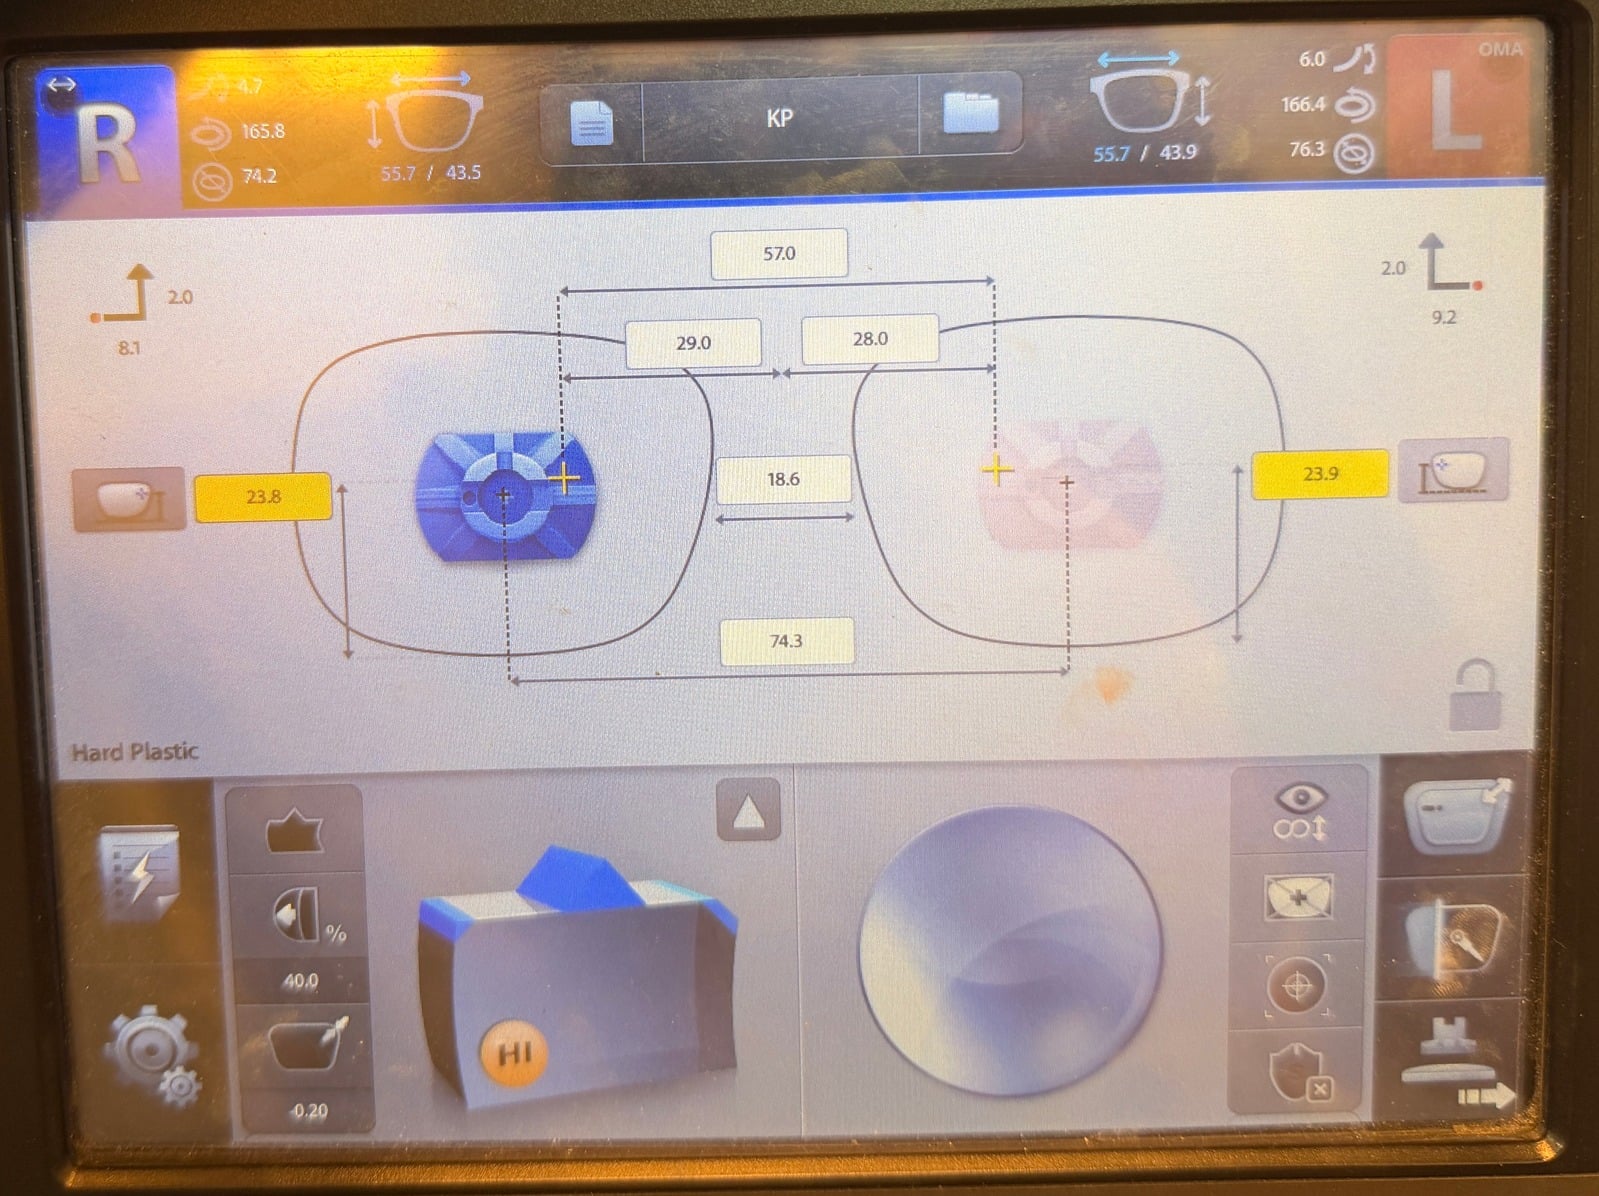
- Size up 0.15
- If Rx — adjust the DBL value; if you don't, the PD will be wrong
Edger
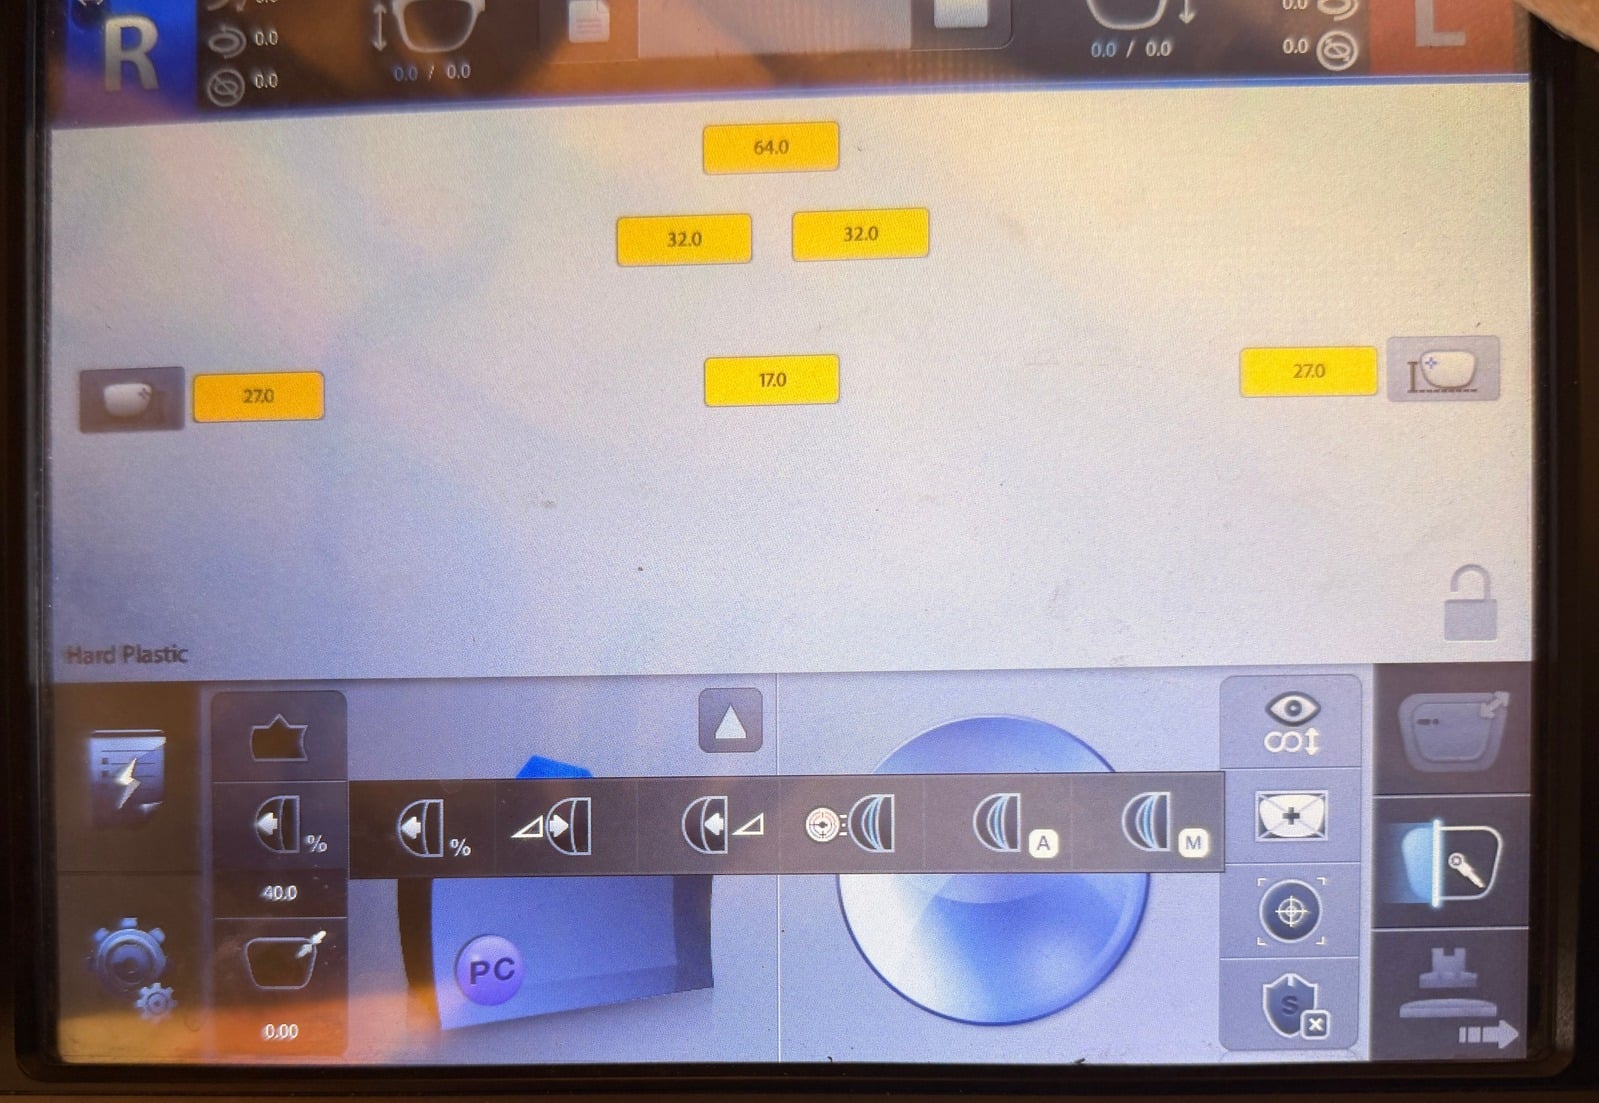
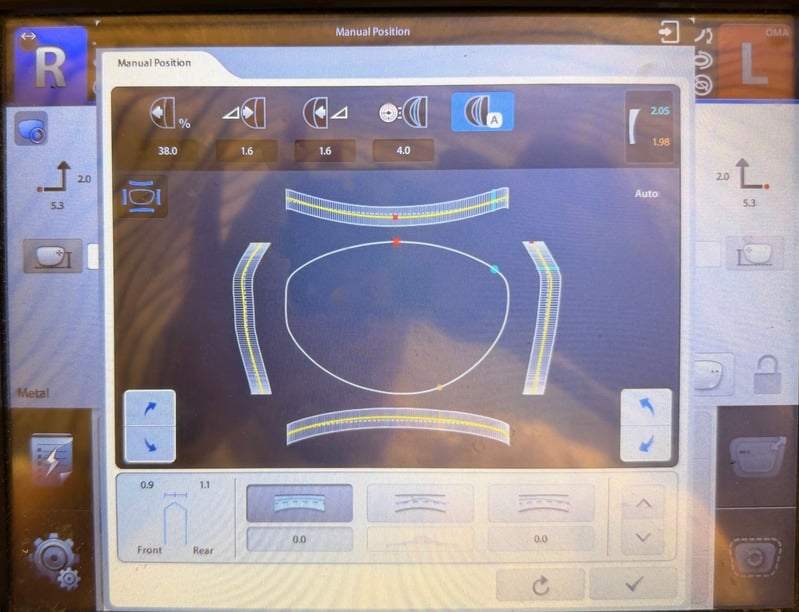
- Select "M" if you want to shift the lens placement within a frame (for high Rx's to hide disperse thickness) and BCGs
- It will then prompt the next screen before cutting — this is where you can see where the bevel will be positioned
- Watch how the yellow lines change and make sure it still leaves space for the bevel
- BCGs: move placement so it's approx. 0.7 / 1.1
Lens Sizing
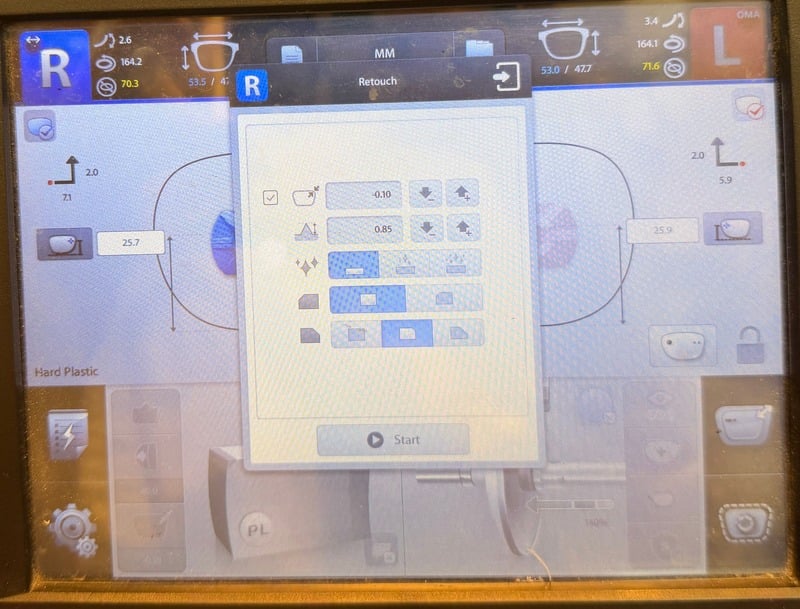
- To size down after a lens has been cut → press the retouch button (bottom, rightmost button on edger)
- Size down conservatively but efficiently — a "-0.05" adjustment does hardly anything, and remember: you can take down more, but can't add back
- The retouch screen also gives you the option to add/remove a polish or safety bevel
- Some frames need to be sized down prior to cutting: Elites −0.30, BCGs −0.20
- Set it to size down before edging it
Manual Bevel Placement & Frame Curvature
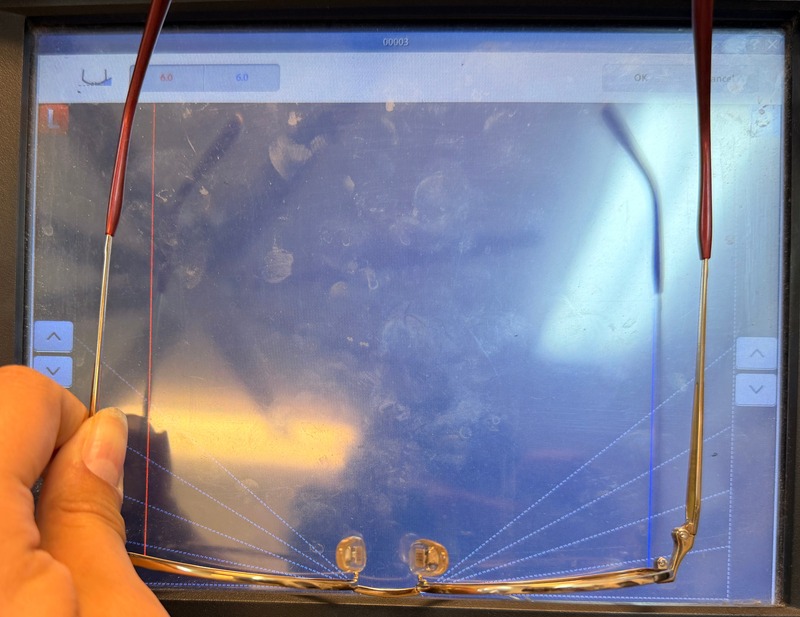
- If you take a digital scan or only trace 1 side of a frame, the edger will prompt you to put in the curve of the frame before it cuts
- Mostly used for ½ rims, wraps, and rimless
- Align the bridge with the screen, and match the red line to the most curved part of the eyewire
- Most are 2, 4, 6, 8, 10
Speed Settings
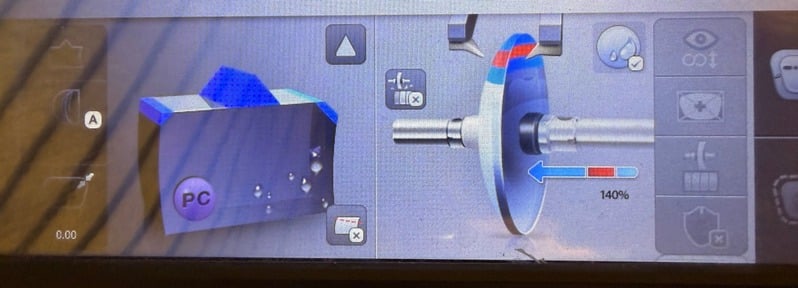
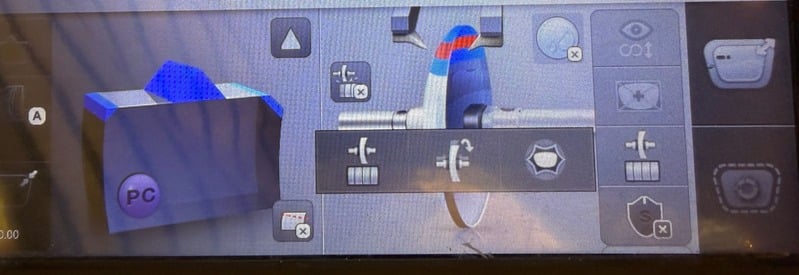
- Fastest Mode (machine default) — Plano Sun, Plano Bluelight, Rx Sun from Cherry. Should always be set at 140% clamp pressure.
- Axial Mode (removes the water droplets) — Rx Lenses (stock velas/seikos/ltechs, Cherry lenses that aren't tinted), Plano Velas, Plano Polar Sun
Marking a Lens
- Lines are used to determine if a lens has turned → if they break while edging, the lens turned and axis is off
- Make a line along the 180, 1 above it, and 1 below it — aligned with the outer corners of the front side of the anti-slip disc to catch slippage as quickly as possible
- These lines matter most for Vela lenses (they're so slippery) and any high-cyl lenses (less room for error)
- Lenses from Cherry are much less slippery — you can get away with marking them at the 180 if high cyl or multi-focal
Tips & Tricks
- The edger should always be cutting something → pause whatever you're doing to make sure something is cutting. While it cuts, you can: mount lenses in another frame, block additional orders, fill frame holes, order other lenses, type itemized receipts
- If a lens was hard to mark with lines, there's a high likelihood it will turn — keep an eye on it in the edger (same with high cyl, and velas for a Y2K or other small frame)
- Keep the frame, lenses, and Rx form in its tray while moving it around — once blocked, add the tray to the bottom of the pile so orders stay in cutting order
- While waiting for a frame to trace: enter PD, make lens material changes, adjust the desired safety bevel
- If it's a multifocal — make the Seg Height change BEFORE switching to the blocking screen; start with the eye that has a higher default, then account for the difference on the second eye
- Always cross-reference the order invoice with the Rx Form — sometimes the lens material gets changed. This is also a chance to confirm the lens was ordered correctly (Rx values, PD, Seg, tint color) → if something's wrong, order a redo instead of cutting it
- Name the order with the patient's First + Last initials, adding a number for multiples (e.g. Jon Hershman's 3 frames → JH1, JH2, JH3)
- Half-rims and rimless take longer to edge — prioritize orders accordingly
- The edger can only pull up a pattern within 3 previously cut orders — otherwise it must be retraced and sent over again
- If the edger is recalibrated, the pre-determined size-down amount may change (Elites, BCGs)
- If a plano lens is "too small to cut," try increasing the PD on the tracer
- If bevel placement or sizing is routinely off, check the edger for excess lens debris blocking the wheel, and clean the water spigots so they're spraying where needed
- Change the poly sock routinely — check it when turning on the machines or before cutting your first set of lenses
- The tracer & edger don't save info once turned off — if you block something, cut it. If you retrace a frame, always reblock it (Rx orders only)
What are our rewards points?
▾
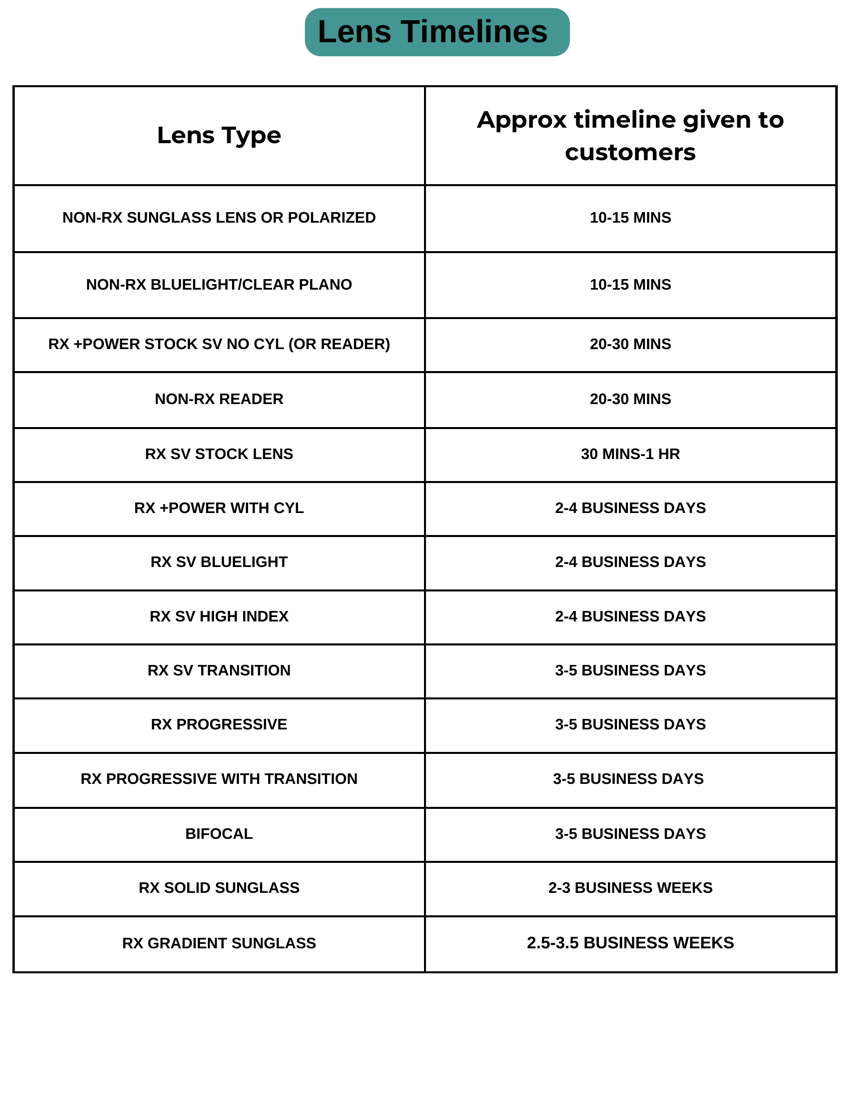
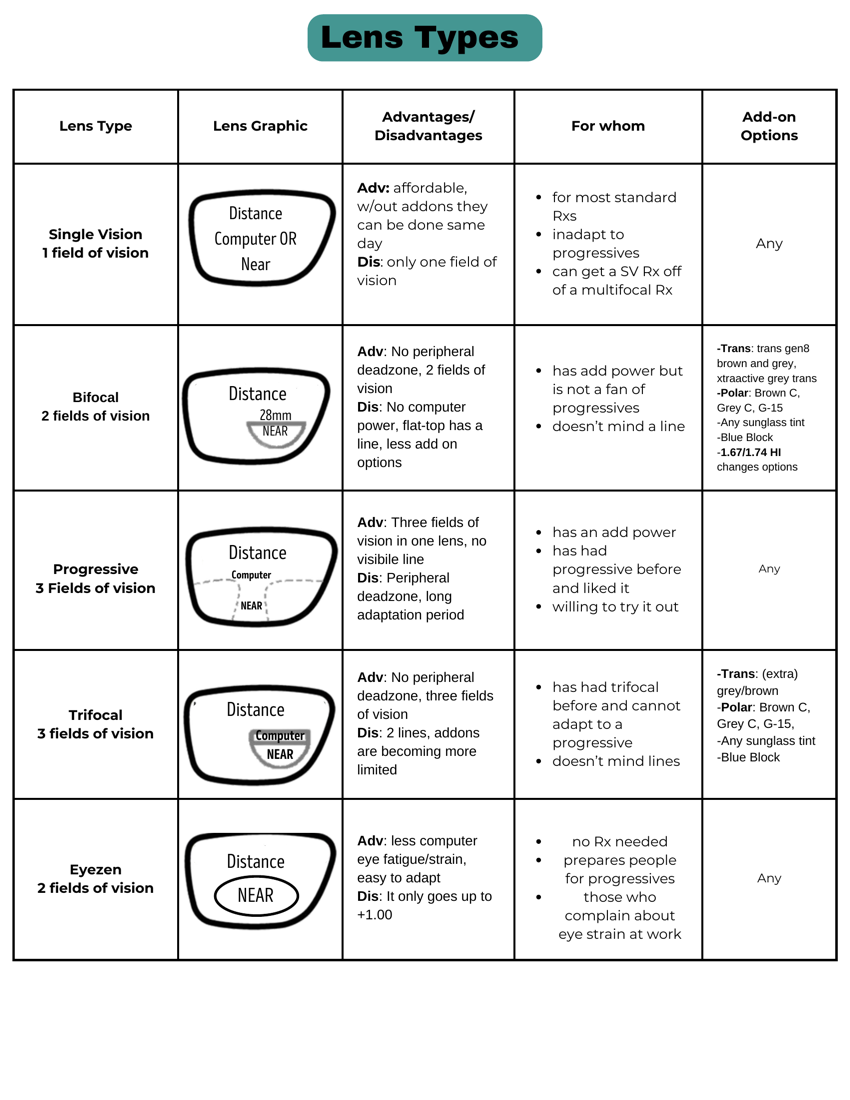
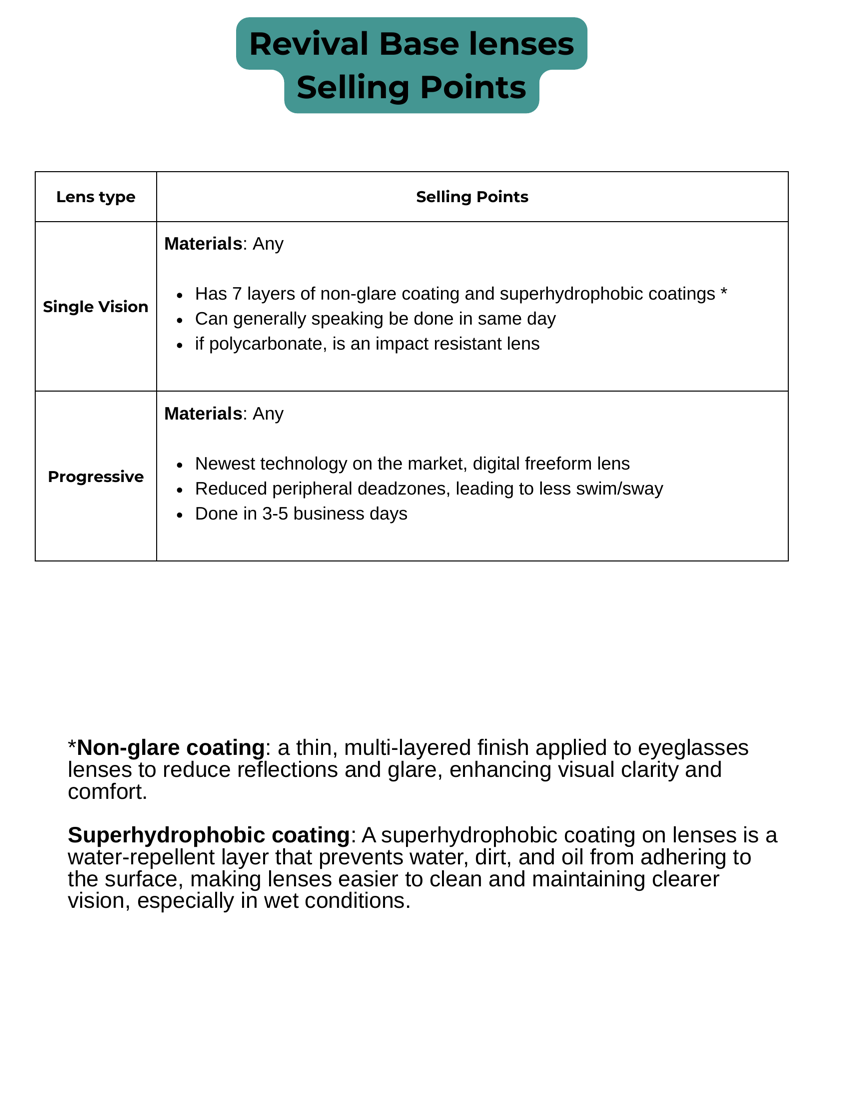
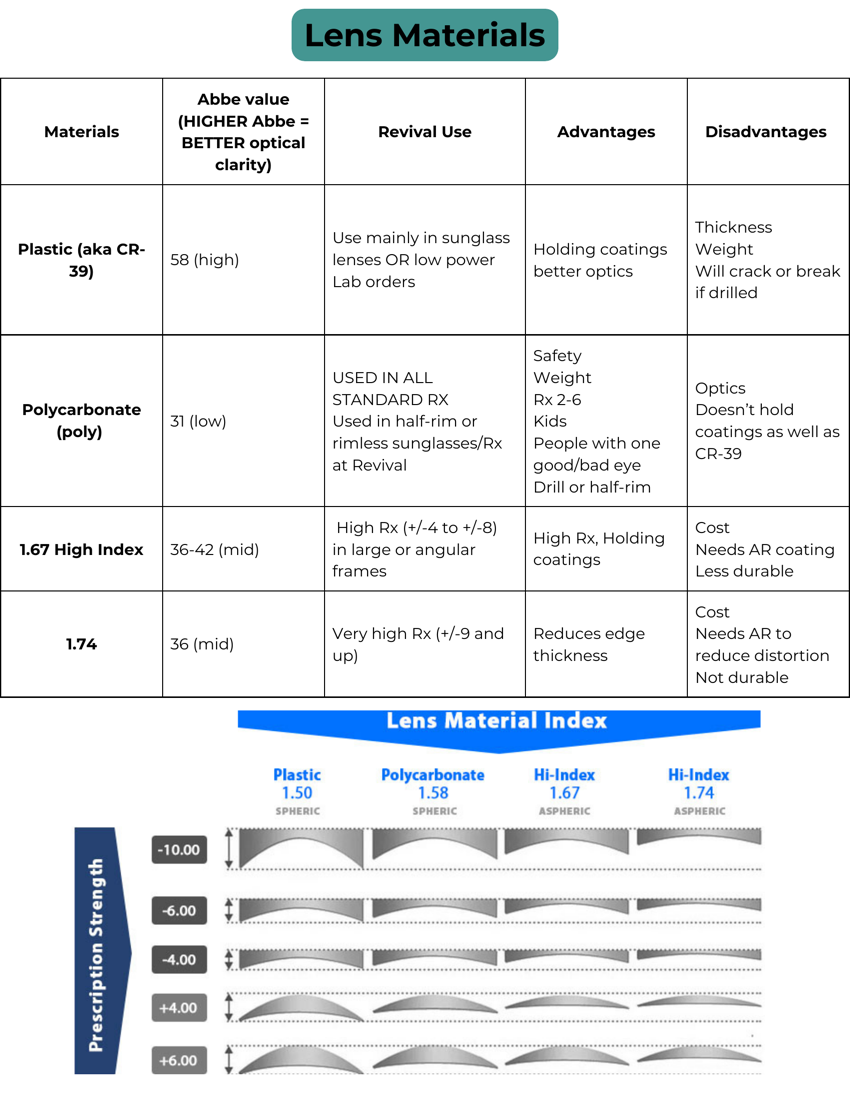
Is there a resource guide for lenses and turnaround times?
▾